

Radon Mitigation Basics for New Homeowners
Moving into a new home is an exciting milestone, but it comes with its share of responsibilities. Among them, understanding radon and how to address it should be high on the priority list for new homeowners.
Radon gas is a threat that can impact the health and safety of your home and family. This blog will introduce you to the health risks of radon, explain why mitigation is essential, and guide you through the necessary steps to safeguard your home. By the end of this guide, new homeowners will have a solid grasp of the radon mitigation basics.
What Is Radon?
Radon is a colorless, odorless gas that forms when the uranium that’s naturally present in soil breaks down. Outdoors, radon dissipates harmlessly into the atmosphere. However, when radon enters an enclosed space like a home, it can accumulate to dangerous levels.
Radon typically seeps into homes through cracks in the foundation, walls, and floors. It can also enter through gaps around pipes, sump pumps, and construction joints. Since radon is invisible and odorless, homeowners can’t detect it without radon testing.
Long-term radon exposure is extremely dangerous to humans. The Environmental Protection Agency (EPA) states that “radon is the second leading cause of lung cancer.” For homeowners moving into a new property, understanding radon’s risks is critical for protecting all inhabitants.
Why New Homeowners Should Prioritize Radon Mitigation
When moving into a new home, there’s a long list of items to check off, from signing up with local utility providers to unpacking boxes. However, homeowners should add radon mitigation to the list.
Mitigating radon levels not only protects the health of your family but also adds long-term value to your home. Many states now require radon disclosure during property sales, and homes equipped with mitigation systems will appeal to future buyers. Addressing radon early in your ownership ensures that you aren’t caught off guard during a future resale process or health check.
Detecting Radon in Your Home
Testing for radon is the first step toward protecting your home and family. Thankfully, testing is straightforward and widely accessible. There are three methods for homeowners to detect radon—short-term tests, long-term tests, and continuous monitoring.
Short-term test kits, which are available in most hardware stores or online, collect radon samples over two to five days. These kits are an excellent starting point for new homeowners who want quick results.
Long-term test kits monitor radon levels over three months to a year. It offers homeowners a comprehensive understanding of the fluctuating radon levels indoors.
Continuous monitors track the presence of radon in real time, which is why they’re one of the best options for homeowners. Devices such as the EcoBlu and EcoQube provide radon readings in minutes. They compile average radon levels over weeks, months, and years. The EcoQube device pairs with a smartphone app, enabling homeowners to view radon fluctuations and results at all times.
If you’re moving into a property with a basement or crawl space, you may want to test for radon immediately. The living spaces above underground areas are particularly susceptible to radon buildup. Testing before your family fully settles into the home can help you mitigate radon’s presence from the beginning.

Interpreting Radon Test Results
Interpreting the results of a radon test is key to understanding whether mitigation is necessary. Radon levels at or above 4 picocuries per liter (pCi/L) are unsafe according to the EPA. If the test results indicate levels of radon at or above this threshold, it’s essential to act promptly to reduce the associated health risks.
Even if the radon level falls between 2 and 4 pCi/L, the EPA still recommends considering mitigation to limit long-term exposure. After all, radon levels fluctuate based on weather conditions, household ventilation, and structural factors. Monitoring radon levels over time ensures you’re always on top of lessening the risks of radon exposure.
Radon Mitigation Techniques
If the test reveals high levels of radon, the next step is to implement a mitigation strategy. The goal is to reduce radon concentrations to safe levels. Radon mitigation systems prevent radon gas from accumulating in your home by redirecting it outside. Here are the most common systems available to homeowners.
Active Sub-Slab Depressurization
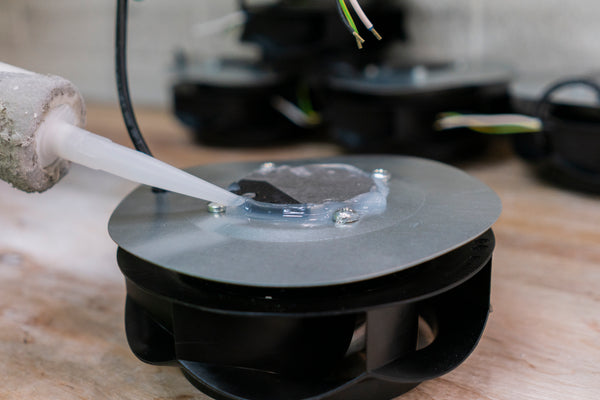
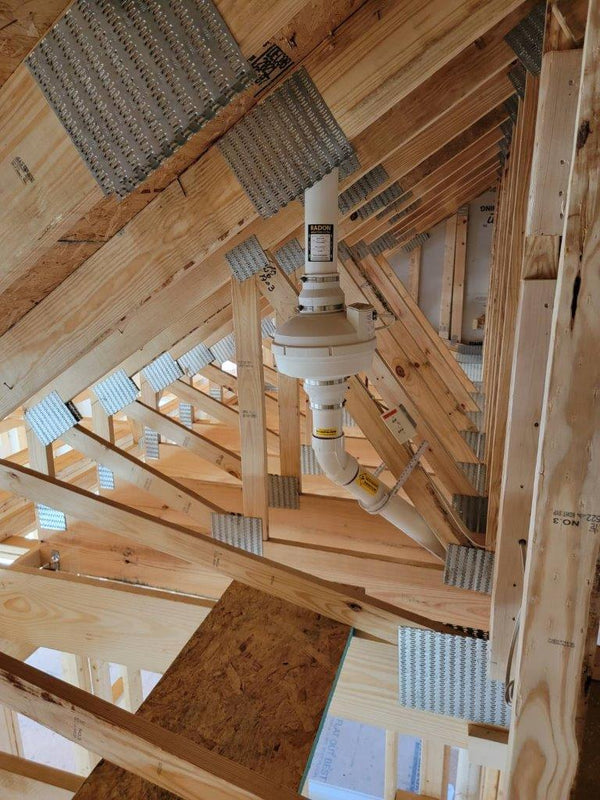
Active sub-slab depressurization uses a fan and a PVC piping system to draw the radon from beneath your foundation and vent it outside. The radon fan must run continuously for the system to work. That’s why it’s critical to use quality radon fan brackets to keep the fan stable and operational.
Passive Sub-Slab Depressurization
Passive sub-slab depressurization is similar to the active version, but it doesn’t utilize a radon fan. Instead, it relies on natural airflow to decrease radon levels.
Crawlspace Encapsulation
Crawlspace encapsulation involves sealing the crawlspace with a durable vapor barrier to prevent radon from entering your home. Another important step is to seal gaps and cracks in your foundation. This will improve the overall effectiveness of your mitigation system.
DIY vs. Professional Mitigation
When weighing whether to address radon mitigation on your own or hire a professional, there are a few important trade-offs to consider.
Taking the DIY route is an affordable option that can cost between $300 and $800. Kits that replicate professional systems are available, but improper installation could leave your home’s radon levels unchanged.
If you opt for professional mitigation, experts can assess your home’s unique structure and recommend solutions tailored to your needs. Licensed radon mitigators also have access to specialized tools and monitoring that ensure effective mitigation. While hiring a professional can cost between $800 and $1,500, the value in expertise and the health security it provides is invaluable.

Maintaining the Radon Mitigation System
Once your radon mitigation system is ready, regular maintenance is necessary to guarantee it operates effectively. Test your home’s radon levels every two years.
Keep an eye on the vent fan. Any unusual noises or reduced airflow could indicate a problem. Replacing fan components as they age is a simple way to maintain system performance.
Examine the foundation and reseal any new cracks that could cause radon to seep into your home. A well-maintained radon mitigation system allows homeowners to enjoy long-term protection and peace of mind in their new environment.
Take Action To Establish a Safe Home
Radon mitigation basics for new homeowners come down to one simple message: protecting your home and family starts with awareness and action. Testing your home for radon, understanding the test results, and investing in a reliable mitigation system are crucial to a healthy living space.
Don’t delay implementing a radon mitigation system. Festa Sun Enterprises has numerous resources available to safeguard your home from dangerous radon levels.