DIY Radon Testing: A Comprehensive Guide
Radon gas is an invisible threat that could be lurking in your home. The good news is that you can take control with DIY radon testing. In this comprehensive guide, we will explore what radon gas is, why testing for it is essential, and how to perform tests yourself. By the end, you’ll understand how to interpret your results and what steps to take next.
Introduction to Radon Gas
Radon is a naturally occurring radioactive gas that forms when the uranium in soil, rock, and water breaks down. It can enter homes through cracks in your basement or concrete slab. While usually harmless outdoors, radon can accumulate to dangerous levels indoors. Prolonged exposure to high radon levels is a common cause of lung cancer right after smoking.
Importance of DIY Radon Testing for Homeowners
Testing for radon is an essential preventive measure for any homeowner. Radon levels can vary significantly from one house to another, even within the same neighborhood. Therefore, assuming your home is safe without testing can be a dangerous oversight.
DIY radon testing provides an affordable and straightforward way for homeowners to check radon levels. Basic testing doesn’t require professional services, which will save time and money. By taking matters into your own hands, you can ensure your home remains a safe haven.
When To Test Your Home for Radon
You should test your home for radon at least once every two years, but there are specific circumstances that may warrant more frequent testing. If you’ve recently done renovations, such as finishing a basement or adding an extension, these changes can affect radon levels and warrant re-testing. You should also do radon testing if you’re buying, selling, or building a home.
Additionally, you should test homes in high-risk areas or those with a history of elevated radon levels annually. Seasonal variations can also influence radon concentrations, making it wise to test during colder months when you usually keep your home sealed tightly.
Standard Types of Home Radon Tests
There are two main categories of radon tests available for home use: passive tests and active tests. Passive tests don’t require batteries or electricity, while active tests do.
Passive Tests
Passive radon tests collect a sample from the air in your home, which is why they don’t need battery power. They include devices like charcoal canisters and alpha track detectors.
- Charcoal canisters absorb radon from the air over a specified period, usually between two and seven days. After the period ends, you’ll send the canister to a laboratory for analysis. This is a budget-friendly option since most tests cost less than $50.
- Alpha track detectors, on the other hand, use a plastic film that alpha particles mark from radon decay. They typically stay in place for a more extended period, ranging from three months to a year. Once the testing period ends, you’ll send it to a lab for the results.
Active Tests
Active radon tests are battery-powered devices that continuously monitor radon levels. These tests provide real-time data and can detect fluctuations in radon levels more accurately.
However, they tend to be more expensive and complex to operate. Examples include continuous radon monitors, which professionals often use due to their precision and ability to provide hourly readings. That said, these radon monitors are available to homeowners. Some models also track levels of VOCs and particulate matter in your home.
Short-Term or Long-Term Tests: Pros and Cons
Choosing between short-term and long-term radon tests depends on your specific needs and circumstances.
Short-Term Tests
Short-term tests, which last from two to 90 days, provide quick results and are ideal for initial screenings. They can detect temporary spikes in radon levels, which might indicate a problem. However, because radon levels fluctuate due to weather and seasonal changes, a single short-term test may not always give a complete picture.
Long-Term Tests
Long-term tests, lasting over 90 days, offer a more accurate representation of average radon levels over time. These tests account for daily and seasonal variations, providing a more comprehensive assessment. While they require more patience, long-term tests are generally more reliable for making informed decisions about mitigation.
Interpreting Radon Test Results
Once you receive your radon test results, understanding what they mean is crucial. We usually measure test results in picocuries per liter (pCi/L). The Environmental Protection Agency (EPA) suggests homeowners install mitigation measures if radon levels exceed 4 pCi/L.
Understanding Different Levels
- If your test shows radon levels above 4 pCi/L, conduct a follow-up test to confirm the results. If the second test also indicates high levels, install mitigation as soon as possible.
- For levels between 2 pCi/L and 4 pCi/L, consider installing a mitigation system to reduce radon levels further.
- Levels below 2 pCi/L are acceptable by the EPA, but you should still conduct regular monitoring.
Next Steps After the Initial Test
After obtaining your initial DIY radon test results, you may need to take further action.
Further Testing
If your radon levels are above 4 pCi/L, do a second test to confirm the results. This step checks the accuracy of your findings. If both tests indicate high radon levels, you need to consider mitigation.
Mitigation Options
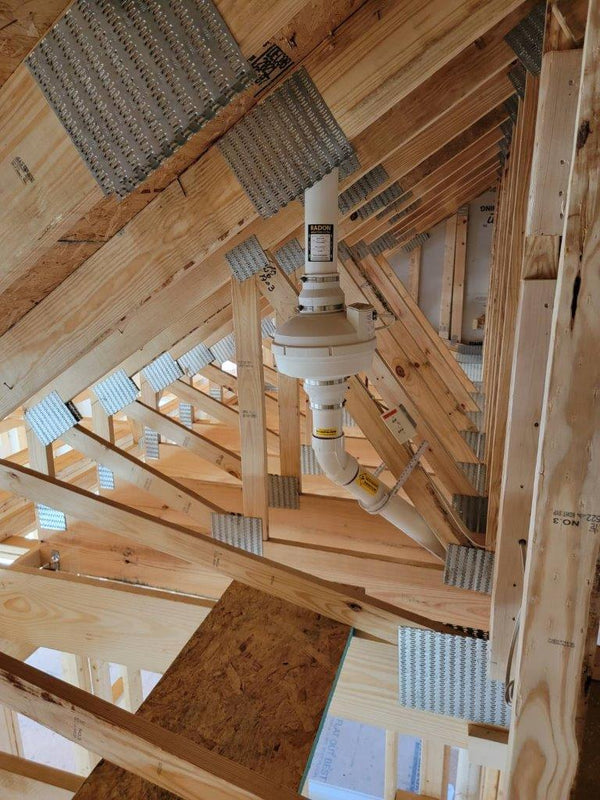
Mitigation involves reducing radon levels in your home to safe levels. While there are some DIY projects that you can handle, such as caulking or sealing cracks, other methods require professional expertise. Some of these options include basement slab depressurization, ventilation improvements, or a radon reduction fan installation. Consulting with a professional radon mitigation contractor can help you determine the best approach for your home.
Monitoring and Maintenance
Regular radon testing should be part of your ongoing home maintenance routine. Even after installing a mitigation system, continue to monitor radon levels to ensure its effectiveness. Periodic testing, especially after significant home renovations or changes in the foundation, is critical.
Benefits of Regular Radon Testing and Ongoing Maintenance
Regular radon testing provides peace of mind and ensures a safe living environment. Early detection allows for timely mitigation, reducing the risk of lung cancer and other radon-related health issues. Investing in regular testing is an investment in your well-being.
This comprehensive guide on DIY radon testing empowers homeowners to take control of their living environment. Understanding the risks associated with radon, knowing how to test for it, and interpreting the results are crucial steps in ensuring a safe home. Most importantly, regular testing and ongoing maintenance protect you and your loved ones from this harmful gas.


